Configure a PHP Website on an AWS AMI Instance
This post will demonstrate how to configure a PHP website on an AWS AMI Instance using the Free Tier. Amazon AWS provides the ability for users to manage a t2.micro instance without incurring additional charges.
There will be several things to learn about AWS if you aren’t familiar with using their instances. These include launching an instance, configuring security groups and more. In addition, the AMI instances provided do not come with a web server, MySQL or PHP initially installed, so commands will need to be run to get these components set up.
To begin, it is assumed that you have already signed up to Amazon AWS and can login to your account.
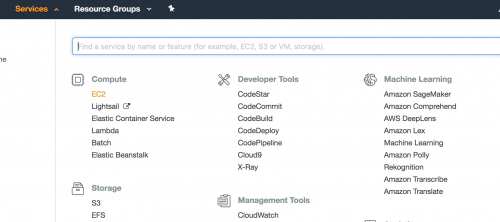
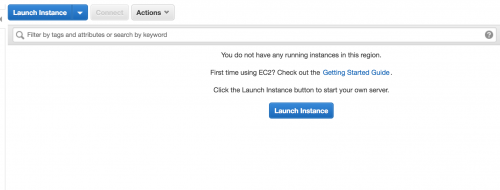
Instances in AWS can be found within the Services -> EC2 section.
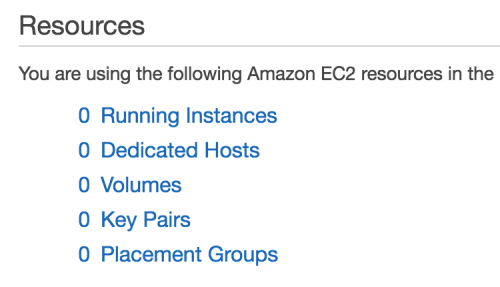
By clicking on 0 Running Instances, you’ll taken to the Instances overview page. Within this page, an Instance can be configured and launched using AWS’s Free Tier.
Create a key pair
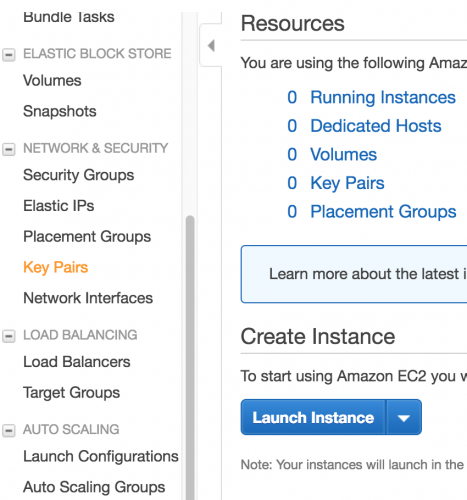
Before doing so, you must create a Key Pair to be able to log in to your instance. This can be done by clicking on the Key Pairs menu item within the Network & Security section on the left hand side.
Click on Create Key Pair and give your key pair a name.

After naming the key pair, you should notice that a .pem file is automatically downloaded to your computer. It is important that this file is kept safe, as currently, it is the only method of logging into your instance when the instance gets created.
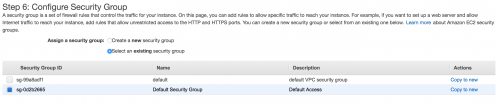
Create a Security Group
Secondly, under the Network & Security section, click on the Security Groups menu item. Apart from the default security group created by AWS, you’ll need to configure security groups in order to manage access to your instance, for example, over HTTP and SSH.
Click on Create Security Group to add security groups which can then be assigned to your instance. When configuring a website, then by default, all users have access to the website over HTTP/HTTPS and only limited users are given access to SSH.
Below is an image representing a common security group created.
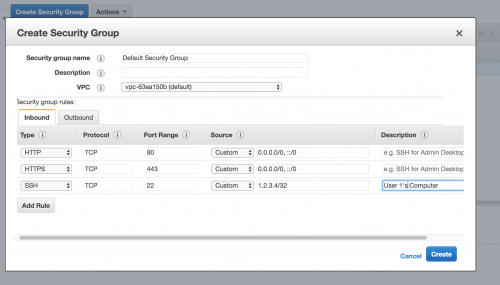
If you are the user who’ll be accessing the instance over SSH, you can change the rule and the Source dropdown from Custom to My IP. AWS will then populate the text field with your IP.
Launch an instance
Now to create an instance and assign the security group.
Head back to Instances section within the EC2 dashboard and click on Launch Instance.
You’ll then be taken through the steps to configure the instance.
For step 1, select the first option, Amazon Linux AMI 2017.09.1 (HVM), SSD Volume Type.

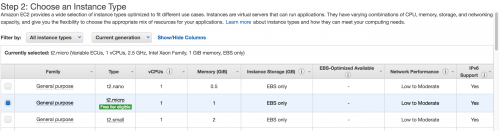
Step 2 will allow you to select an Instance Type. As this article will be making use of AWS’ Free Tier, choose the t2.micro instance type marked as Free tier eligible.
Now click the Review and Launch button, and you’ll be taken to a review page before launching the instance. Click on Edit Security Groups and Select an existing security group.
Click on Review and Launch and then Launch to launch your instance.
Right before launching the instance, you will be prompted to use or create a Key Pair enabling you to connect to your instance.
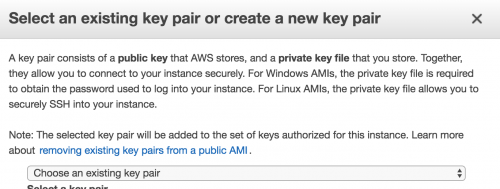
Select the key pair created earlier in this post and finally launch your instance.
The instance may take a few minutes to initialise, and the status of the instance can be seen back on the EC2 Dashboard page.
Assign an Elastic IP
Before connect to the instance over SSH, you may wish to assign an Elastic IP to your instance. Elastic IPs can be assigned to an instance that prevents the IP address from changing whenever the instance is restarted.
Under the Network & Security tab, click on the Elastic IPs menu item to get taken to the Elastic IPs page.
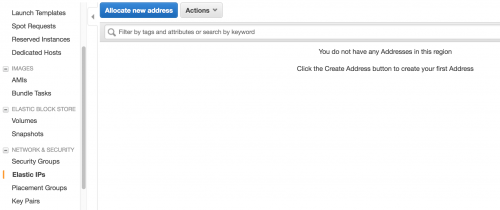
Click on Allocate new address and then Allocate and you will obtain an Elastic IP.
With the IP created, click on the Actions dropdown and choose the Associate address option.
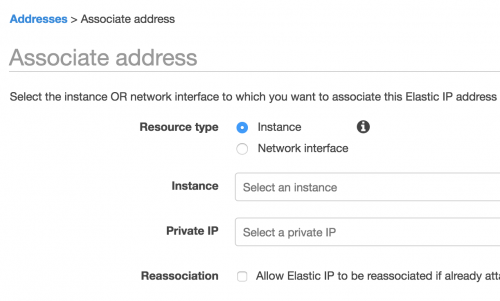
You’ll then be able to select your instance from the Instance dropdown.
Connect to your instance
Head back to the EC2 Dashboard page, and along the row where your instance is listed, note down the IP address under the IPv4 Public IP column. This is the Elastic IP assigned to your instance which will now be used when connecting to your instance via SSH.
Locate your downloaded pem key on your computer, and run the following SSH command.
$ ssh -i /path/to/your/key.pem ec2-user@<IP Address>
Where <IP Address> is replaced with the Elastic IP.
If your downloaded key doesn’t have the correct file permissions, you won’t be able to connect to your instance. You can alter the file permissions by running the following command.
$ chmod 0600 /path/to/your/key.pem
After connecting to your instance, you can add your computer’s public key within the ~/.ssh/authorized_keys file on the server.
Click here to find out how to access your public key.
Now proceed with installing a LAMP stack on the server.
Firstly, ensure all of the instances’ packages are up to date by running the following command.
$ sudo yum update -y
Install the LAMP stack
Now use yum install to install Apache, PHP and MySQL. For example, to install Apache 2.4, PHP 7.0 and MySQL 5.6, use the command below.
$ sudo yum install -y httpd24 php70 mysql56-server php70-mysqlnd
Confirm that Apache has been installed correctly by attempting to start the service.
$ sudo service httpd start
Run the following command to ensure that Apache automatically attempts to start when the instance is restarted.
$ sudo chkconfig httpd on
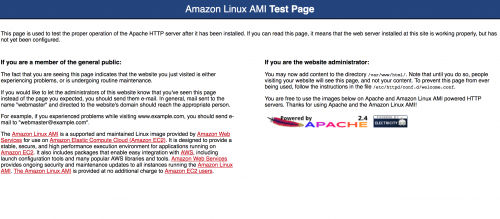
Head back to the EC2 Dashboard Test AMI test page using public DNS address found in instance overview, and under the Public DNS (IPv4) column, copy the public DNS into your web browser.
If the steps have been followed correctly, you should be directed to the Amazon AMI Test Page.
Set File Permissions
As the page suggests, website content can be added to the /var/www/html/ directory.
Before doing so, ensure the correct file permissions are set.
Add the ec2-user user to the apache group.
$ sudo usermod -a -G apache ec2-user
Log out and log back in again to verify the new group.
$ exit
Verify the group.
$ groups
ec2-user wheel apache
Change the group ownership of /var/www and its contents to the apache group.
$ sudo chown -R ec2-user:apache /var/www
Lastly, add group write permissions and set the group on future subdirectories.
$ sudo chmod 2775 /var/www
$ find /var/www -type d -exec sudo chmod 2775 {} \;
$ find /var/www -type f -exec sudo chmod 0664 {} \;
Configure MySQL
Start the MySQL service.
$ sudo service mysqld start
Run mysql_secure_installation and run through the steps including setting up a password for the root user, removing the test database and more.
$ sudo mysql_secure_installation
Similar to Apache, to ensure MySQL starts at every boot, run the following command.
$ sudo chkconfig mysqld on
Test a PHP file
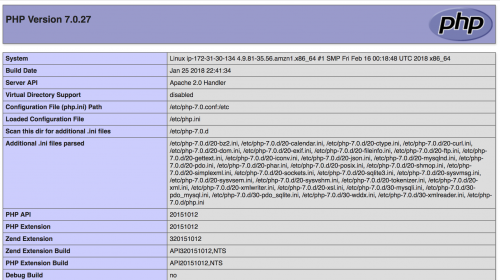
The easiest way to test if the web server has been installed correctly is to create a PHP page echoing out the phpinfo() function.
Within the /var/www/html directory, create a phpinfo.php file and add the following contents.
<?php
phpinfo();
Using the Public DNS address used earlier to access the AMI Test Page, head to the /phpinfo.php route and you should see the PHP information page appear.
Conclusion
Although there are a lot of services that AWS provides and the interface may look confusing at times, Amazon provide a great Free Tier solution with some useful guides on how to get started using your website on their instances.
Whilst this post has explained the basics of installing a web server, PHP and MySQL, there may be other components to install on the instance. Examples being Apache’s mod_ssl and mcrypt modules that many PHP websites use.
Don’t forget to add VHosts configuration within the /etc/httpd/conf.d directory. Create a .conf file in this directory. For example, yourdomain.co.uk.conf.
Within this configuration file, you can set up vhosts configuration for your domain, including specifying the document root where the website content is located in the instance.
Example website configuration might look like the following.
<VirtualHost *:80>

  ServerName yourdomain.co.uk
  DocumentRoot /var/www/vhosts/yourdomain.co.uk/htdocs

  <Directory /var/www/vhosts/yourdomain.co.uk/htdocs>
    AllowOverride All
  </Directory>
</VirtualHost>
After adding the configuration, ensure that you restart the web server using sudo service httpd restart.
A common method of securing a website is by using Let’s Encrypt. Installing certbot on an Amazon AMI Instance can be viewed by clicking on this link.