Add a Module in Zend Framework 3
One of the first tasks that developers will learn when using the latest of version of ZF is how to add a module in Zend Framework 3. There are subtle differences to the way that they are added in ZF2.
If you have read the previous post regarding how to get started with Zend Framework 3, you’ll note that at the bottom of the page there is a brief summary of how modules are included within the skeleton application.
To recap, modules are added under the modules directory and are loaded via ZF’s ModuleManager. Like Zend Framework 2, a Module.php class exists for each module defined, however in ZF3, this file has been moved into the src directory from its previous position within module directory itself.
This means that adding a module, a Module.php class should be defined. The class should also contain a getConfig() method, which includes module-specific configuration.
The example below defines a Custom module.
// module/Custom/src/Module.php
<?php
namespace Custom;

class Module
{
    const VERSION = '1.0.0';

    public function getConfig()
    {
        return include __DIR__ . '/../config/module.config.php';
    }
}
Zend Framework also recommends using Composer’s autoloading capabilities. Therefore within the composer.json file in the project root, look for the autoload section which should look like the following by default:
// composer.json
"autoload": {
    "psr-4": {
        "Application\\": "module/Application/src/"
    }
},
The new module should then be added to the list.
// composer.json
"autoload": {
    "psr-4": {
        "Application\\": "module/Application/src/",
        "Custom\\" : "module/Custom/src"
    }
},
There is also now a modules.config.php in the ZF3 skeleton application which is included in the application.config.php file. modules.config.php includes a list of modules that ZF3 should load.
Any new modules should be added to this array.
// modules.config.php
return [
    'Zend\Router',
    'Zend\Validator',
    'Application',
    'Custom',
];
Once the changes above have been made, run the following Composer command to ensure Composer updates its autoloading rules.
$ composer dump-autoloadThe next step is to add the module configuration module.config.php file. This file resides in the module’s config directory, and contains configuration data such as defining controllers, routes and view template paths.
// module/Custom/config/module.config.php
<?php
namespace Custom;

use Zend\Router\Http\Segment;
use Zend\ServiceManager\Factory\InvokableFactory;

return [
    'controllers' => [
        'factories' => [
            Controller\IndexController::class => InvokableFactory::class,
        ],
    ],

    'router' => [
        'routes' => [
            'album' => [
                'type'    => Segment::class,
                'options' => [
                    'route' =>  '/custom[/]',
                    'defaults' => [
                        'controller' => Controller\IndexController::class,
                        'action'     => 'index',
                    ],
                ],
            ],
        ],
    ],

    'view_manager' => [
        'template_path_stack' => [
            'album' => __DIR__ . '/../view',
        ],
    ],
];
The route defined above suggests that the custom module will be accessible when navigating to the /custom URL. An IndexController will handle the route and an indexAction() method will be responsible for executing code within the controller.
Controllers are defined within a Controller directory within the src directory of a module.
A basic controller class might look like the following.
// module/Custom/src/Controller/IndexController.php
<?php
namespace Custom\Controller;

use Zend\Mvc\Controller\AbstractActionController;
use Zend\View\Model\ViewModel;

class IndexController extends AbstractActionController
{
    public function indexAction()
    {
        return new ViewModel();
    }
}
As defined in module.config.php the view templates are located within the view directory in the module structure. The template path should follow the path of routing given to the URL defined within your module.
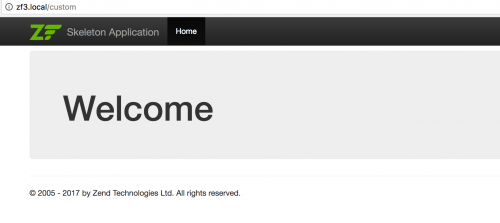
In this example, we have a custom URL, a IndexController.php class and an indexAction() method. Therefore within the view directory, we should have a custom/index/index.phtml file. Note that the view templates are not included within the src directory.
Whilst you can pass additional information into the view, this example will be kept as simple as possible, and some HTML will be rendered.
// module/Custom/view/custom/index/index.phtml
<div class="jumbotron">
    <h1>Welcome</h1>
</div>
If you have followed the steps correctly, within your ZF3 application you should be able to navigate to the /custom URL and be presented with the welcome message.