Add a Navigation Controller in Xcode
Most beginners start learning the components of Xcode by creating a single view application project. At some point, they start to wonder how to add a navigation controller in Xcode so that they can move between different views of the application.
Add a View Controller
So how can this be achieved? Firstly, another view needs to be added. So start by heading to the Object Library menu in the bottom right hand corner of Xcode, and search for View Controller. Drag the View Controller into your project so that you now have two views.
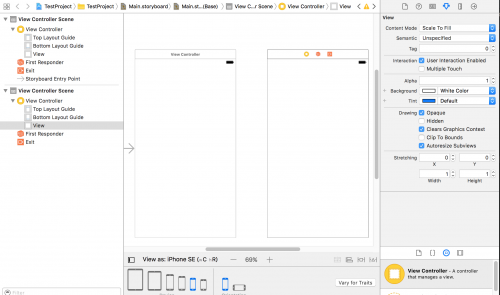
Next we need to know how to transition between the first view and the second view. This is where we add in our navigation controller.
Add a Navigation Controller
Within Xcode, select the first view to highlight it as this is the view that the navigation controller will be added to. Now head to the Editor menu at the top, head to Embed In and select Navigation Controller.
This will add a navigation controller to your project.
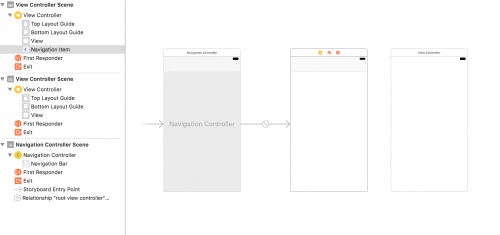
A few things have happened within your project. You’ll notice the connection represented by the arrow between the navigation controller and the first view. The entry point arrow has been moved before the You’ll also see that the first view now have space at the top for the navigation bar to reside in. This is where we’ll be adding a button to transition to our second view.
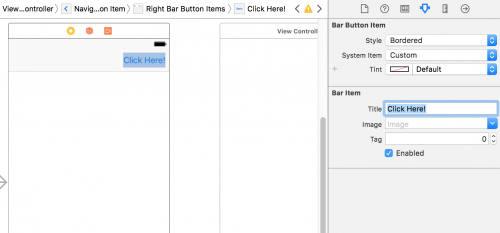
This button is called a Bar Button Item. Locate this button within the Object Library and drag it to the first view into the navigation bar space.

You can change the title of the Bar Button Item by altering the Title text field within the Attributes Inspector menu.
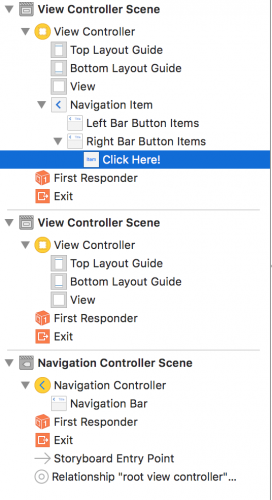
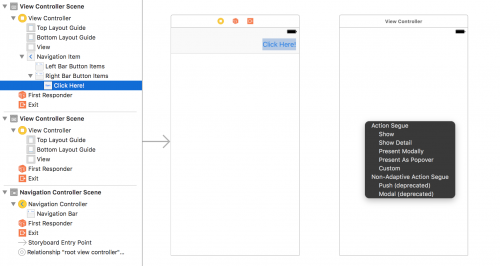
Finally, we need to hook up the Bar Button Item to transition into the second view. To do this, select your Bar Button Item from the View Controller scene.
Now you want to hold ctrl button, select your Bar Button Item and drag it to your second view. When doing this, you should see a blue line coming from your Bar Button Item onto your second view.
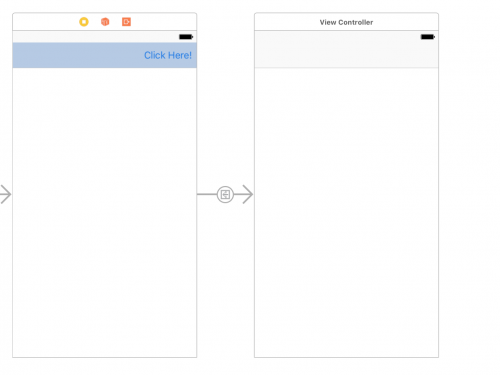
When you have dragged the button over, you’ll be presented with a Segue menu. For this example, select the Show option within the Action Segue menu.
If you have done this correctly, you will see that the second view now also has a navigation bar.
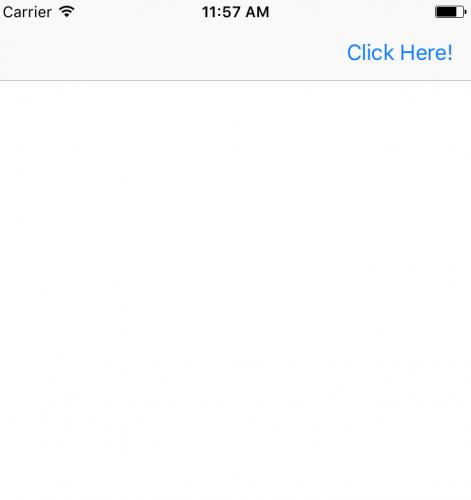
Run Your Application
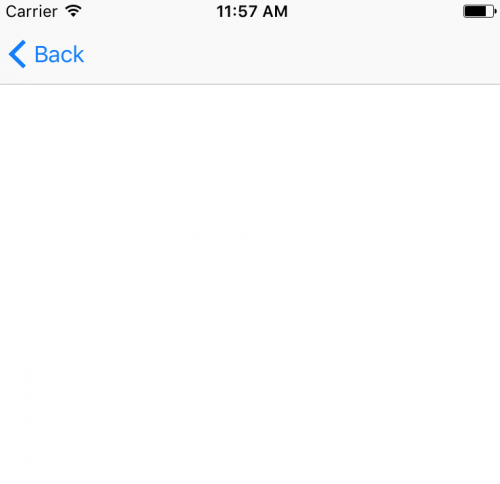
Although we can’t see it in Xcode, our second view has actually got a back button within the navigation bar. To view this and to confirm that our navigation controller is successfully working, run your application and you’ll see that you can transition between the first and second views.
Note: This article is based on Xcode version 8.