Custom Page Templates in Magento 2
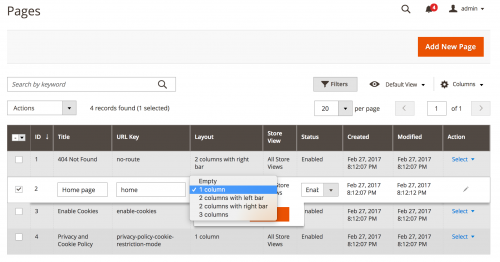
Magento provides a default number of page templates you can use to display page content on. For example, you can set your CMS Home page to use either the empty, 1 column, 2 columns with left bar, 2 columns with right bar or 3 columns template.

We have the ability to add custom page templates in Magento 2. The default templates are defined within layout XML configuration within a layouts.xml file.
// vendor/magento/module-theme/view/frontend/layouts.xml

<?xml version="1.0" encoding="UTF-8"?>
<page_layouts xmlns:xsi="http://www.w3.org/2001/XMLSchema-instance" xsi:noNamespaceSchemaLocation="urn:magento:framework:View/PageLayout/etc/layouts.xsd">
    <layout id="1column">
        <label translate="true">1 column</label>
    </layout>
    <layout id="2columns-left">
        <label translate="true">2 columns with left bar</label>
    </layout>
    <layout id="2columns-right">
        <label translate="true">2 columns with right bar</label>
    </layout>
    <layout id="3columns">
        <label translate="true">3 columns</label>
    </layout>
</page_layouts>
The page templates themselves contain layout XML configuration located within a page_layout directory.
- empty.xml – vendor/magento/module-theme/view/base/page_layout/
- 1column.xml – vendor/magento/module-theme/view/frontend/page_layout/
- 2columns-left.xml – vendor/magento/module-theme/view/frontend/page_layout/
- 2columns-right.xml – vendor/magento/module-theme/view/frontend/page_layout/
- 3columns.xml – vendor/magento/module-theme/view/frontend/page_layout/
Within these .xml files, <container> nodes are defined that assist with structuring the template.
So to add a custom template, ensure that you have created a custom module and define your own layouts.xml file within the view/frontend directory.
This file will contain a pair of <layout> nodes that will contain an id attribute used to define your custom layout template.
// app/code/[Vendor]/[Module]/view/frontend/layouts.xml

<?xml version="1.0" encoding="UTF-8"?>
<page_layouts xmlns:xsi="http://www.w3.org/2001/XMLSchema-instance" xsi:noNamespaceSchemaLocation="urn:magento:framework:View/PageLayout/etc/layouts.xsd">
    <layout id="custom">
        <label translate="true">Custom Template</label>
    </layout>
</page_layouts>
Now define a custom.xml layout file within a page_layout directory within view/frontend.
Note that the name of the file, custom should correspond to the value of the id attribute given in layouts.xml.
For simplicity, the layout configuration will be copied over from 1column.xml into this file.
// app/code/[Vendor]/[Module]/view/frontend/page_layout/custom.xml

<?xml version="1.0"?>
<layout xmlns:xsi="http://www.w3.org/2001/XMLSchema-instance" xsi:noNamespaceSchemaLocation="urn:magento:framework:View/Layout/etc/page_layout.xsd">
    <update handle="empty"/>
    <referenceContainer name="page.wrapper">
        <container name="header.container" as="header_container" label="Page Header Container" htmlTag="header" htmlClass="page-header" before="main.content"/>
        <container name="page.top" as="page_top" label="After Page Header" after="header.container"/>
        <container name="footer-container" as="footer" before="before.body.end" label="Page Footer Container" htmlTag="footer" htmlClass="page-footer"/>
    </referenceContainer>
</layout>
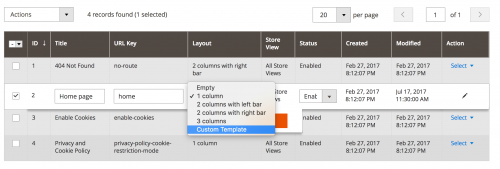
You should now be able to select the custom template from within the admin.

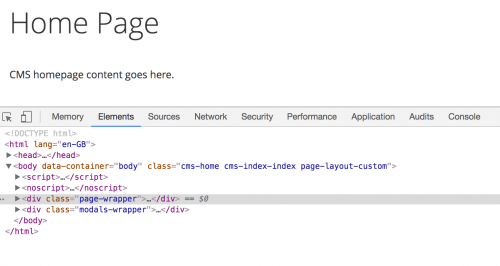
You can also verify your CMS page is using the custom template by checking one of the <body> element classes.
Magento will add the ID of the template as a suffix to the page-layout- class. Using the custom template created above, that class becomes page-layout-custom.

In this example, the custom template contains the same layout configuration as the 1column template. You can modify the custom.xml and change any layout configuration necessary to suit your needs.
Note: This article is based on Magento CE version 2.1.7.