Getting Started with Valet Plus
Valet Plus is a development environment for macOS systems based off of the popular Laravel Valet package. From the Valet Plus documentation on Github, Valet+ configures your Mac to always run Nginx in the background when your machine starts. Then, using DnsMasq, Valet+ proxies all requests on the *.test domain to point to sites installed on your local machine.. Getting started with Valet Plus requires completion of a few steps that can be seen below.
Installation
Firstly, ensure that Homebrew is installed on your system.
$ /usr/bin/ruby -e "$(curl -fsSL https://raw.githubusercontent.com/Homebrew/install/master/install)"
Then, install PHP 7.1 using Homebrew.
$ brew install php@7.1
Ensure that Composer is installed and the composer command is available globally.
$ brew install composer
Add export PATH="~/.composer/vendor/bin:$PATH" to your system’s .bash_profile so the composer command can be run globally.
Finally, install Valet+ via Composer.
$ composer global require weprovide/valet-plus
Now you should be able to run valet commands. Run the following command that checks for common issues preventing Valet+ from installing.
$ valet fix
Run the valet install to complete the installation process along with MySQL (use the --with-mariadb to use MariaDB instead of MySQL. The install command also ensures that the Valet+ daemon starts automatically when your system starts up, meaning that you don’t have to manually start the Valet+ process.
You can run valet --version to find the current version of Valet+ installed on your system.
$ valet --version
Password:
Valet+ 1.0.14
Configuring Websites
Up until this point, Valet+ will allow you to ping a *.test domain. However, without configuring a site path, the following message will be encountered.

You can create a new directory or use an existing one to configure websites to use with Valet+.
For example, a sites directory might be created within your system’s home directory.
$ mkdir ~/sites && cd ~/sites
Run the valet park command to register the current working directory as the project’s root.
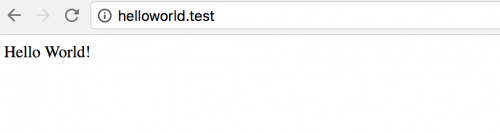
Now, as an example, create a helloworld directory along with an index.php file within this directory with the following contents.
<?php echo 'Hello World!';
Now head to the helloworld.test domain within the browser, and you should notice the Hello World! text appear.
Should your website/application rely on specific versions of PHP, you can use the valet use command to switch version.
$ valet use 5.6
So with just a few simple commands, Valet+ can serve websites. Valet+ also provides commands to set up a MySQL or MariaDB database. Steps to do this will be covered in a future post.