Magento 2 Tax Tutorial Part 2
Welcome to Magento 2 Tax Tutorial Part 2. This will continue on from the first post, where we look further into adding Tax Rates and Rules.
Previously, we managed to configure a tax rule to show on the frontend. Furthermore, the rate was displayed either by it being calculated on the checkout after the customer enters their shipping address, or by default by configuring the default tax destination calculation in the admin.
However, there is more to tax rules in Magento than just determining which location the customer is from.
A Magento tax rule is mainly comprised of the following:
- Tax Rate(s)
- Customer Tax Classes
- Product Tax Classes
This can be seen in the US Customer rule created in the previous post.
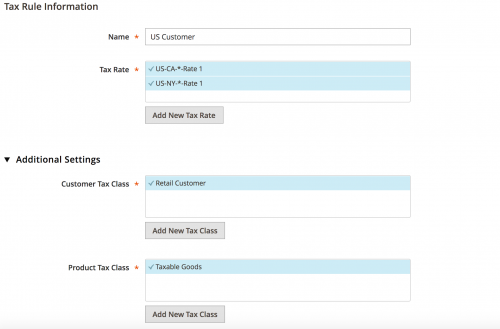
Here we made sure that the example product set up had its Tax Class attribute set to Taxable Goods, but where does the Customer Tax Class come from?
The configuration for this can be found within Stores -> Customer Groups.

These are the default Customer Groups Magento provides. All of the groups by default are assigned the Retail Customer tax class. This includes the NOT LOGGED IN customer group that is the group assigned to users who have not registered an account on the website.
This means that if we were to change the default Customer Tax Class used to something else, or change the Product Tax Class assigned to the test product, the tax rule would not apply on the frontend.
Now there may be occasions where a merchant has wholesale customers as well as retail customers. The retail customers should be charged tax whereas the wholesale customers should be tax exempt. Usually the merchant will set up multiple website views to cater for this.
For the merchant to exclude Wholesale customers from any tax rules, the following steps should be taken.
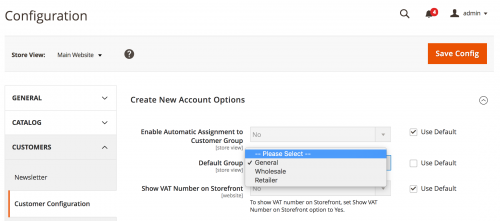
1. Within Stores -> Configuration -> Customer -> Customer Configuration, under the Create New Account Options section, change the Default Group dropdown and select Wholesale. If a ‘wholesale’ website has been configured within Magento, ensure that the dropdown value is changed with this website’s configuration scope.
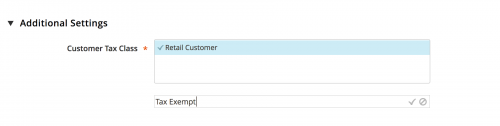
2. Heading to Stores -> Tax Rules, click to edit any tax rule, expand Additional Settings and click on the Add New Tax Class button below the Customer Tax Class multiselect to add a new tax class.
Note that when the tax class is added, you do not need to re-save the Tax Rule.
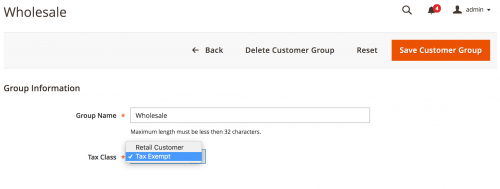
3. Finally, in Stores -> Customer Groups, click on the Wholesale group to edit it, and set the Tax Class to the newly added Tax Exempt class.
Now when customers register via the register form on the wholesale site, they’ll be placed within the now default Wholesale group. As the Tax Exempt customer tax class is not currently used within any Tax Rule configuration, wholesale customers will be exempt from any tax rules.
Moving away from the multiple website setup, what if we were dealing with multiple tax rules? Let’s just use two for this example. Assume we are still using the US Customer Tax Rule set up in part 1 of this post with the US-CA-*-Rate 1 California rate, what if we wanted to add a rule that applied to all standard United States customers, and had a rate of 10%?
Would Magento add these rules together and calculate 18.25%? Or would Magento work out the total including 8.25% tax, and then work out 10% of the calculate total?
Let’s see this in action by adding a new Tax Rate rate within Stores -> Tax Zones & Rates. Add the following information.
- Tax Identifier – US Standard Rate
- Zip/Post is Range – Unchecked
- Zip/Post Code – *
- State – *
- Country – United States
- Rate Percent – 10
Save the rate, and within Stores -> Tax Rules, add a new tax rule called US Standard Retail Customer selecting the US Standard Rate from the multiselect and ensure the priority of the rule is set to 0.
The tax rule configuration should look like the following.
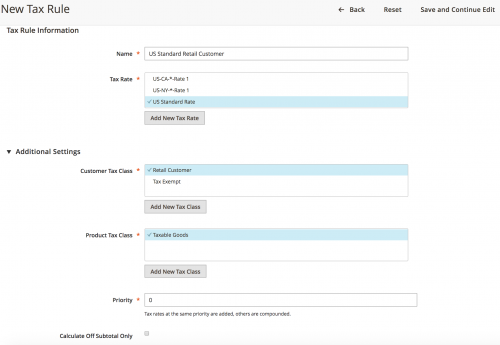
There is an important note under the Priority field which states:
Tax rates at the same priority are added, others are compounded
So now there are a total of 2 Tax Rules within the Magento admin.
- US Customer – with the
US-CA-*-Rate 1andUS-NY-*-Rate 1rates assigned. Currently, we are only testing theUS-CA-*-Rate 1rate by changing the default tax calculation destination’s state toCalifornia, giving us an 8.25% tax rate. - US Standard Retail Customer – the one recently added, with the
US Standard Rateassigned, giving a 10% tax rate.
As the rules both have a priority of 0, the rates are added together. This is noticeable on the frontend as we can see with the test product of $100 added.
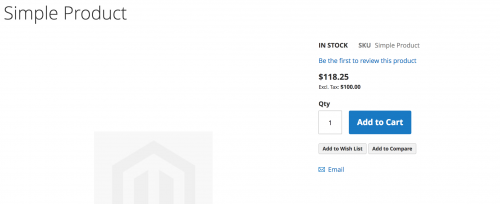
Both 8.25% and 10% percentages have been added together to make 18.25%, which has been added onto the initial $100.
Now we should be looking to test out the rules by changing one of the priorities to 1. Do this for the US Customer rule, and lower the priority.
You should now notice the price of the product has changed on the frontend to $119.08.
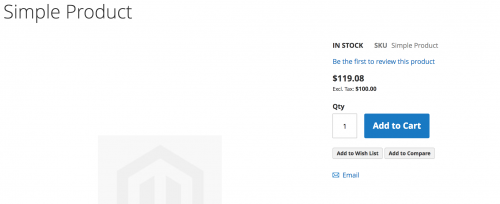
Magento has compounded the tax rates, so that the 10% rate is first applied, giving us $110.
Now Magento calculates 8.25% from $110, which is 9.075. This number is then added to 110, giving a total of $119.08 (Note how Magento rounded the value up here).
That concludes Part 2 of looking into Magento 2 Tax. Next, we’ll look at the effects of adding products in the admin including tax, and what Magento does to calculate prices excluding tax.
Note: This article is based on Magento CE version 2.1.7.