Multiple Views in Swift
When developing a Swift application in Xcode, as your application’s functionality expands, as does the need for more screens to show how the app can flow from one view to another. Multiple views in Swift can be implemented by following a few steps within Xcode.
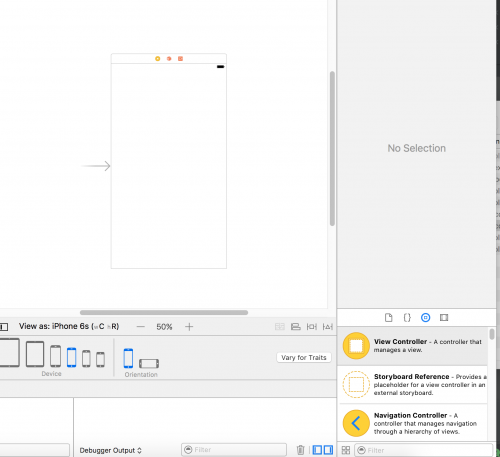
Assuming you already have a single view application open already, add a View Controller by choosing it from the Object Library and dragging it onto your storyboard.
With both views now visible on the storyboard, by clicking on the already existing view (the one with the ‘entry point’ arrow, you should see that the class responsible for managing this view is the ViewController.swift file, which can be seen within the Custom class dropdown within the Identity inspector menu.
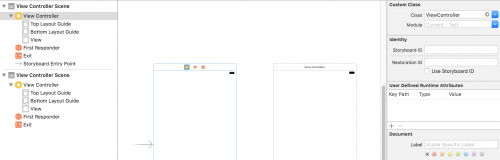
When clicking on the View that’s just been added, you’ll note that the dropdown within the Custom class section has not been populated with a class. This is because Xcode does not know what class to use for your newly created view.
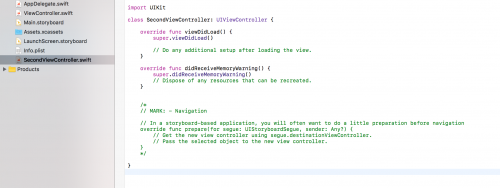
Create a new Cocoa Touch Class in the same directory as ViewController.swift, and call it SecondViewController.swift. The file should have the same markup as the original ViewController.swift file with the additional of a commented out prepare() function.
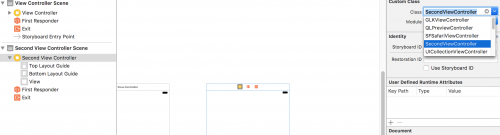
Now head back to the Storyboard, click on the Second View Controller underneath the Second View Controller Scene , head to the Identity inspector and select the SecondViewController class from the Custom Class dropdown.
Now that the second View has been assigned a class, there now needs to be a connection between the first and second View. First of all, add a Button onto the first View.
To add a connection, or Segue as it’s known, hold ctrl and click on the button and drag the cursor across to the second View. After letting go of the ctrl key, you should notice the Segue menu appear prompting you to choose the type of segue you’d like to add.
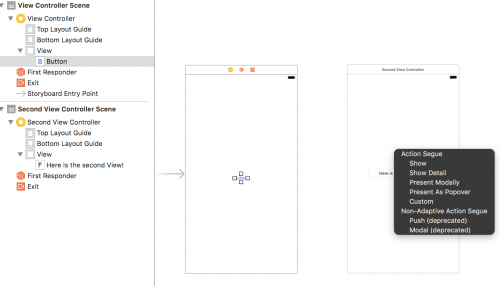
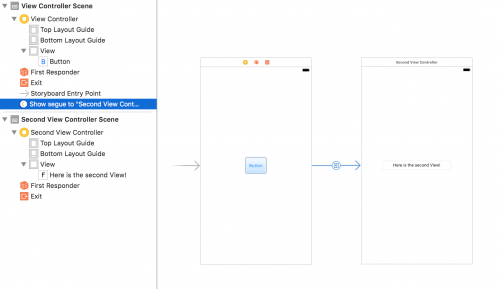
For now just choose the Show option and you should see an arrow appear between the first and second Views linking them together!
The screenshot above also shows a Label added to the second View. This will help differentiate between the Views when running the project.
Build and run the application and you should be able to click on the button on the first View which will take you to the second. Unfortunately now you won’t be able to transition back to the first View, however this can be achieved by adding Navigation Controllers.
It is common in applications to pass data between Views. This will be covered in a future post.