Using React Router v4
When creating websites using React, a router package will need to be installed so that the React application can handle requests within the browser. In order to go about using React Router v4, the react-router-dom package should be installed.
For simplicity, routing will be added to the create-react-app application.
To start with, create the React application by running the following command.
$ npm install -g create-react-app
$ create-react-app reactapp
The above commands will create a React application within a reactapp directory. The React application can be started by cd‘ing into this directory, and running npm start.
$ cd reactapp
$ npm start
The application should then be running locally, and you’ll hopefully see the following page within the browser.
As mentioned earlier, the react-router-dom package needs to be installed to handle the application routing.
Therefore, cd within the reactapp directory, and run the following command.
$ npm install react-router-dom --save
Within the React application’s src/index.js file, import the BrowserRouter component from react-router-dom near the top of the file. BrowserRouter is used for web-based application that run on React. There is also a HashRouter for static websites.
The BrowserRouter component requires a single child element in order to make use of the routing capabilities. Since routing will be often used throughout the application, it is common for the <App /> element to be wrapped within <BrowserRouter>.
The index.js may look like the following.
import React from 'react';
import ReactDOM from 'react-dom';
import { BrowserRouter } from 'react-router-dom'
import './index.css';
import App from './App';
import registerServiceWorker from './registerServiceWorker';

ReactDOM.render(
    <App />,
    document.getElementById('root'));
registerServiceWorker();
Edit the file and wrap the <App /> element within a pair of <BrowserRouter> nodes.
import React from 'react';
import ReactDOM from 'react-dom';
import { BrowserRouter } from 'react-router-dom'
import './index.css';
import App from './App';
import registerServiceWorker from './registerServiceWorker';

ReactDOM.render(
    <BrowserRouter>
        <App />
    </BrowserRouter>,
    document.getElementById('root'));
registerServiceWorker();
The second step will be to define a component that will be used to render content from different routes.
Navigate to the src/App.js file and you should see the following content.
import React, { Component } from 'react';
import logo from './logo.svg';
import './App.css';

class App extends Component {
  render() {
    return (
      <div className="App">
        <div className="App-header">
          <img src={logo} className="App-logo" alt="logo" />
          <h2>Welcome to React</h2>
        </div>
        <p className="App-intro">
          To get started, edit <code>src/App.js</code> and save to reload.
        </p>
      </div>
    );
  }
}

export default App;
Amend the file to look like the below.
import React, { Component } from 'react';
import Header from './Header'
import Main from './Main'
import '../App.css';

class App extends Component {
    render() {
        return (
            <div className="App">
                <Header/>
                <Main/>
            </div>
        );
    }
}
export default App;
You’ll notice that a Header and Main component are rendered within the return statement.
<Main> will contain the content for different pages when their route is requested in the browser.
Here’s how an example Main.js component looks like.
import React, {Component} from 'react'
import { Switch, Route } from 'react-router-dom'

import Home from './Home'
import About from './About'
import Services from './Services'
import Contact from './Contact'

class Main extends Component {
    render() {
        return (
            <main>
                <Switch>
                    <Route exact path='/' component={Home}/>
                    <Route exact path='/about' component={About}/>
                    <Route exact path='/services' component={Services}/>
                    <Route exact path='/contact' component={Contact}/>
                </Switch>
            </main>
        )
    }
}

export default Main
As seen above, the <Switch> and <Route> components are used to map components to the route requested. So if the /about route is requested, the About component will be used and the content returned within the component’s return will be rendered.
The components will be used if the route’s exact path is matched, however you can use just path. This is useful if you have a several pages that render similar content, like a blog. Routes such as /blog or /blog/2 would match the following definition.
<Route path='/blog' component={Blog}/>
Now add the components defined within Main.js. In this example, the Home.js might contain the following code.
import React, {Component} from 'react'

class Home extends Component {
    render() {
        return (
            <p className="App-intro">To get started, edit <code>src/App.js</code> and save to reload.</p>
        )
    }
}

export default Home;
The last step involves adding the navigation enabling a user to click on the links to render the content within the components.
Add the Header component defined within the App.js file, and add the appropriate links.
import React, { Component } from 'react';

import { Link } from 'react-router-dom'
import logo from '../../logo.svg';

class Header extends Component {
    render() {
        return (
            <header className="App-header">
                <img src={logo} className="App-logo" alt="logo" />
                <h2>Welcome to React</h2>
               <nav>
                   <ul>
                        <li><Link to='/'>Home</Link></li>
                        <li><Link to='/about'>About</Link></li>
                        <li><Link to='/services'>Services</Link></li>
                        <li><Link to='/contact'>Contact</Link></li>
                    </ul>
                </nav>
            </header>
        )
    }
}

export default Header;
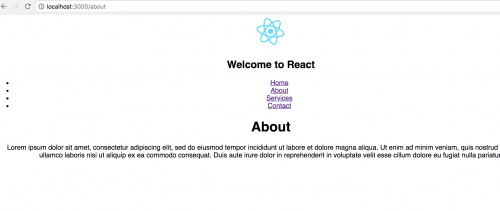
Amend the app.css stylesheet so that the navigation links are clearly visible, and you should be able to successfully navigate around the React application.
There are of course more complex examples of routing that you may be curious about and are not covered in this post, but it should provide a basic overview of how to go about using React Router v4 within a React application.