Backup Code and Databases with Amazon S3
Amazon S3 is one of the most supported cloud storage service available. With Amazon AWS offering a ‘free tier’ package, many users take advantage of the free 5GB storage available from the S3 service. Using the AWS CLI, you can backup code and databases with Amazon S3.
In order to use AWS CLI commands, you must first have pip and a supported version of Python installed on your system.
To install Pip, first run the commands to download the get-pip.py file.
$ curl https://bootstrap.pypa.io/get-pip.py -o get-pip.py
Then run the following command.
$ python get-pip.py
Using the pip command, install the AWS CLI.
$ pip install awscli --upgrade --user
Verify the version of AWS using the aws --version command.
$ aws --version
aws-cli/1.14.9 Python/2.7.14 Linux/4.9.81-35.56.amzn1.x86_64 botocore/1.8.13
Now configure AWS with your AWS IAM user account using the configure command. Here, enter the AWS Access Key ID and AWS Secret Access Key.
$ aws configure
AWS Access Key ID [None]: AKIAIOSFODNN7EXAMPLE
AWS Secret Access Key [None]: wJalrXUtnFEMI/K7MDENG/bPxRfiCYEXAMPLEKEY
Default region name [None]: eu-west-1
Default output format [None]: json
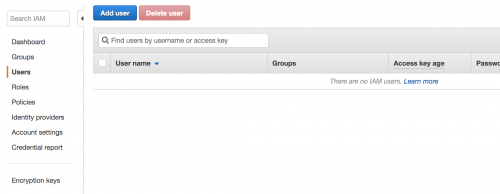
If you do not have a IAM user, create one in the IAM Management Console within your AWS account.

Proceed with the steps, and the keys to the user will be generated. Keep a note of the AWS Secret Access Key, as new Keys need to be generated if you lose it.

In order for the user to gain access to S3, the user must first be assigned a group that contains the AmazonS3FullAccess policy.
Create a group within the Groups section of the IAM menu.

When landing on the Attach Policy page, attach a policy to the group that allows access to S3. In this example, the AmazonS3FullAccess policy is attached.

Save the Group, and navigate back to Users, edit the user created and assign the user to the group.

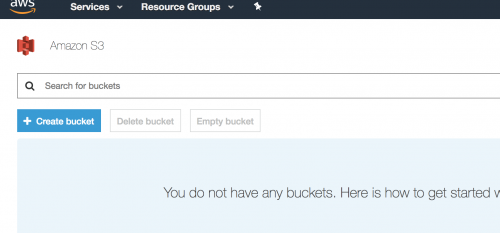
Within Amazon S3, data is stored in Buckets. You can login to your AWS console, and within the S3 section, create a Bucket.

Proceed through the creation steps, ensuring that the correct permissions are given to allow the Bucket to be written to. In addition, make a note of the name of the Bucket created.
SSH back into your system, and navigate to your website’s document root. For example:
$ cd /var/www/site/htdocs
You can create an archive file by running the tar command.
$ tar -zcf ~/code.tar.gz .
Now you can run the aws s3 command to copy the archive into the Amazon S3 Bucket. Ensure that the name of the Bucket created is included within the command.
$ aws s3 cp ~/code.tar.gz s3://yoursite.bucket.com/
upload: ~/code.tar.gz to s3://yoursite.bucket.com/code.tar.gz
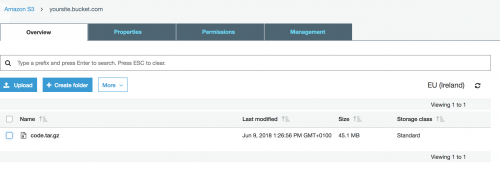
Now navigate to the S3 section within your AWS account, view the bucket and you should note that the tar.gz file has been successfully added.

Similarly with databases, you can run the mysql_config_editor set --user=[user] --password where [user] is the database user. You’ll then be prompted to enter the database password.
You can then run the mysqldump passing in the name of the database, and piping the output to a gzip file. This can be followed by the aws s3 cp command.
$ mysqldump [database_name] | gzip > ~/db.sql.gz
$ aws s3 cp ~/db.sql.gz s3://yoursite.bucket.com/
You can automate the processes of uploading the code and database to S3 by compiling the commands in a shell file. An basic example of what the file might look like can be seen below.
rm $HOME/db.sql.gz
mysqldump [database_name] | gzip > $HOME/db.sql.gz
aws s3 cp $HOME/db.sql.gz s3://yoursite.bucket.com/

rm $HOME/code.tar.gz
tar -zcf $HOME/code.tar.gz /var/www/site/htdocs
aws s3 cp $HOME/code.tar.gz s3://yoursite.bucket.com/